You come home hungry after a long day. Opening the fridge, you spot a can of chickpeas and a jar of tahini. The idea of cooking a big meal feels impossible. Maybe you want a healthy snack, but you’re tired of chips and store-bought dips. What if you could whip up something quick, tasty, and homemade? Hummus is that perfect solution. It’s creamy, packed with flavor, and easy to make—even if you’re tired, busy, or not a kitchen pro. In this guide, you’ll find 3 hummus recipes you can make at home—each with its own twist. No fancy skills, no hard-to-find ingredients, just easy, real food for real life.
But hummus is more than just a quick snack. It’s a food with deep history and culture. Across the Middle East and Mediterranean, families serve hummus at gatherings, picnics, and celebrations. You’ll find it in lunchboxes, on mezze platters, or as the hero of a simple meal.
Once you make hummus yourself, you’ll see why people everywhere love it. The taste is fresh, the texture is creamy, and every bite is full of flavor you simply can’t get from a plastic tub at the store.
Why Make Homemade Hummus?
Homemade hummus isn’t just for chefs. It’s quick, affordable, and you control exactly what goes in. Here’s why you’ll love making your own:
- Ready in 10 minutes or less
- Uses basic, common ingredients
- Cheaper than store-bought brands
- Easy to flavor and customize
- No preservatives or hidden sugars
- Perfect for snacks, lunches, or parties
There’s another benefit: you can adjust the flavor just for you. Want more garlic? Add it. Like it lemony? Squeeze in extra juice. If you have food allergies, you can keep out anything that might cause a problem. Plus, making hummus at home is fun. It’s a quick win in the kitchen, even if you’re new to cooking.
People often don’t realize how much fresher homemade hummus tastes. Store-bought versions can sit on shelves for weeks and often contain extra oil or preservatives. Homemade hummus is lighter, has a brighter flavor, and you can make just the amount you need.
If you’re feeding a crowd, making hummus saves money. Chickpeas and tahini cost less than buying several tubs. You can double or triple the recipe without much extra work. And if you have kids, let them help—measuring, tasting, and blending are easy jobs for little hands.
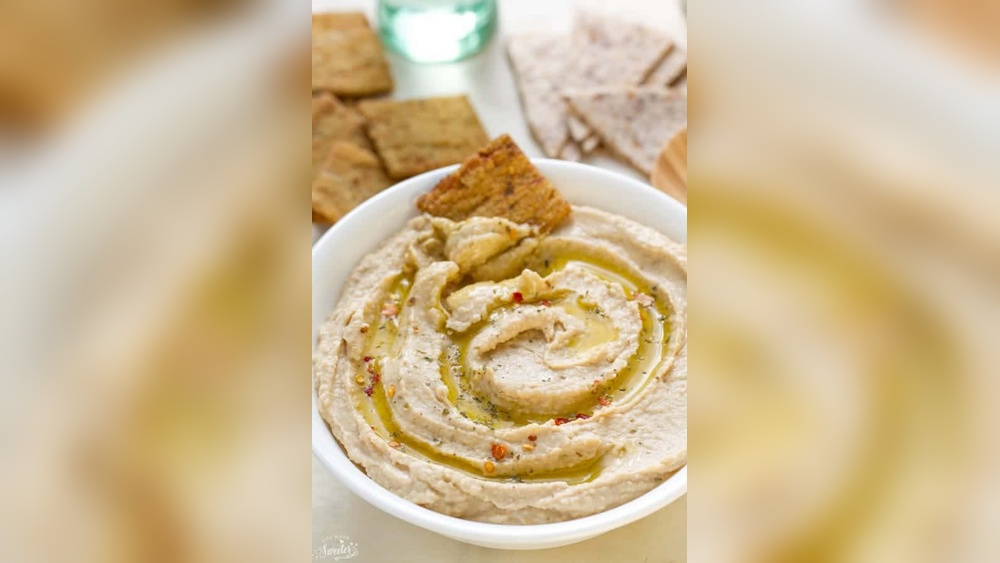
Classic Creamy Hummus (the Ultimate Starter)
The classic hummus recipe is where everything begins. Smooth, creamy, and simple, this version is the base for many other flavors. If you’ve never made hummus before, start here and master the basics.
🍫 Ingredients:
- 1 can (15 oz) chickpeas (drained, rinsed)
- 3 tbsp tahini
- 2 tbsp olive oil (plus extra for serving)
- 2 tbsp lemon juice (fresh)
- 1 small garlic clove
- 1/2 tsp salt
- 1/2 tsp ground cumin
- 2–3 tbsp cold water
- Pinch of paprika (for garnish, optional)
🥣 Steps:
- Add chickpeas, tahini, olive oil, lemon juice, garlic, salt, and cumin to a food processor.
- Blend until mostly smooth, scraping down sides as needed.
- Add cold water, 1 tablespoon at a time, and blend until very creamy.
- Taste and adjust salt or lemon juice if needed.
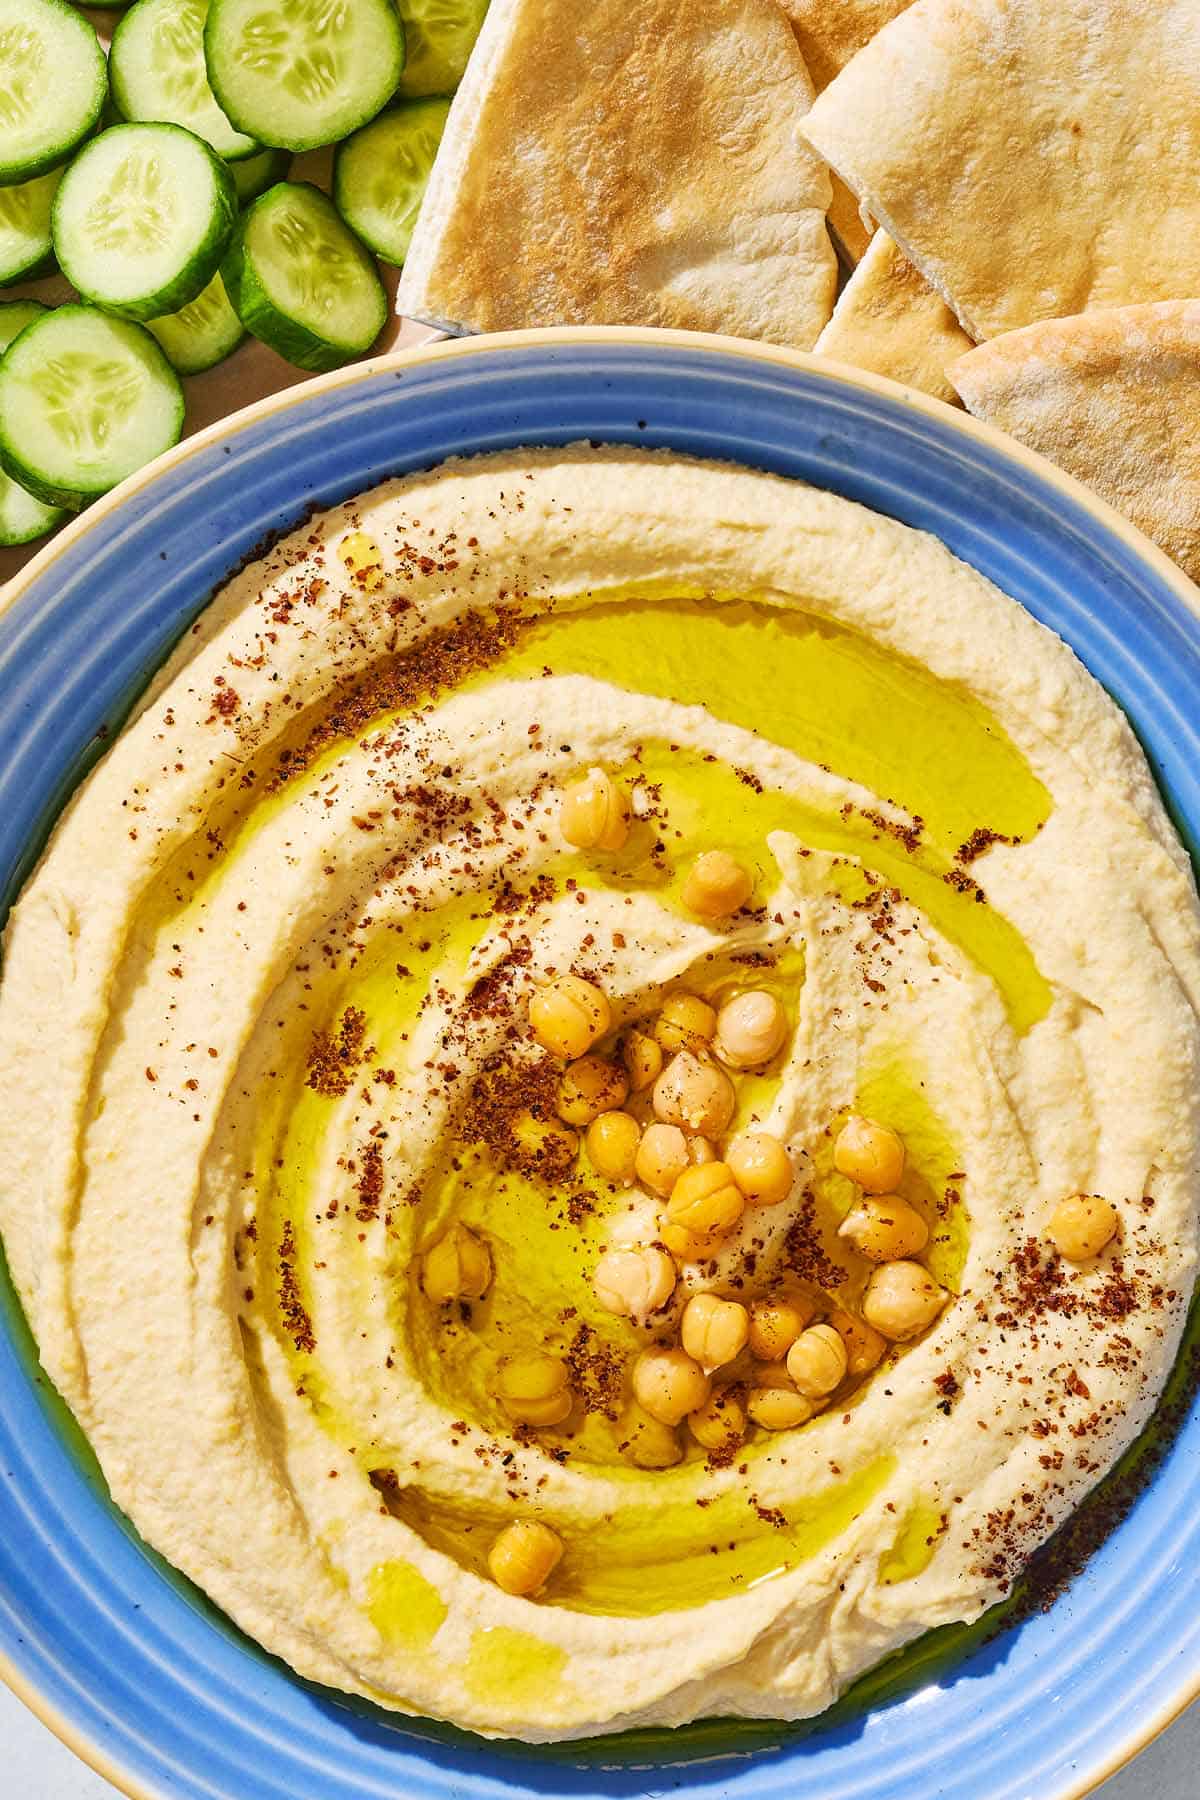
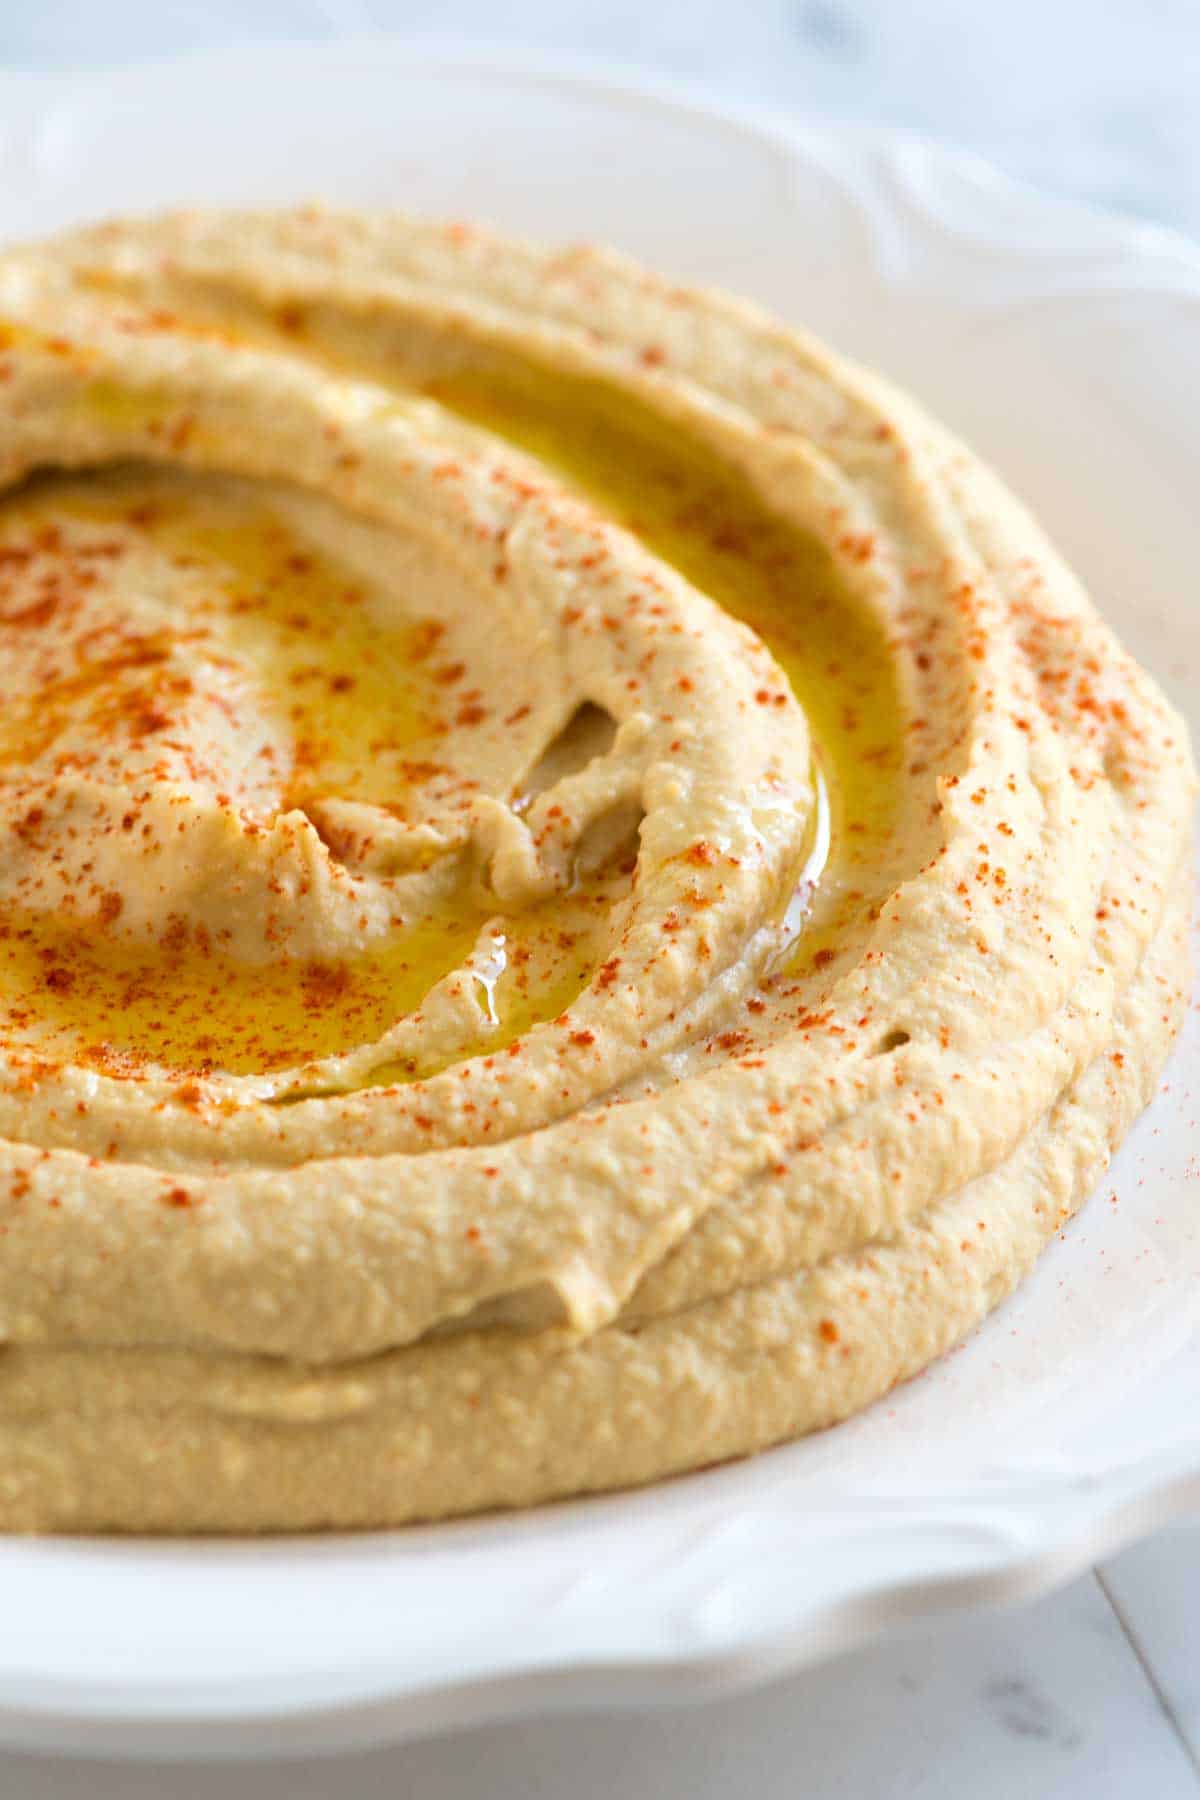
- Spoon into a bowl, drizzle with olive oil, and sprinkle with paprika if you like.
Why you’ll love it: This hummus is classic, silky, and perfect with pita or veggies.
A detail many first-timers miss is that the taste of tahini can vary a lot depending on the brand. Some are more bitter, others are smoother or even sweet. If your hummus tastes a bit strong or bitter, try a different tahini next time, or balance with a touch more lemon juice.
If you want your hummus extra fluffy, blend it for at least two minutes—this lets the blades add air and makes it light.
Classic hummus is endlessly versatile. You can use it for dipping vegetables, spreading on toast, or even as a base for grain bowls. Some people like to add a bit of Greek yogurt for extra creaminess, or top it with toasted pine nuts for crunch.
Credit: www.themediterraneandish.com
Roasted Red Pepper Hummus (colorful & Sweet)
If you like a pop of color and a little sweetness, roasted red pepper hummus is your go-to. The peppers give a rich, smoky flavor and make your dip look beautiful on any table.
🍫 Ingredients:
- 1 can (15 oz) chickpeas (drained, rinsed)
- 1/2 cup roasted red peppers (from a jar or homemade)
- 3 tbsp tahini
- 2 tbsp olive oil
- 2 tbsp lemon juice
- 1 small garlic clove
- 1/2 tsp salt
- 1/4 tsp smoked paprika (optional)
- 2–3 tbsp cold water
🥣 Steps:
- If roasting at home: Place a red bell pepper on a baking sheet. Roast at 425°F (220°C) for 20 minutes until charred. Cool, peel, and remove seeds.
- Add chickpeas, roasted red peppers, tahini, olive oil, lemon juice, garlic, salt, and smoked paprika (if using) to a food processor.
- Blend until very smooth, adding cold water to reach desired consistency.
- Taste and adjust seasoning.
- Serve drizzled with a little olive oil and extra chopped peppers if you like.
Why you’ll love it: This version has a sweet, smoky taste and a beautiful orange color.
If you roast peppers at home, you can add a hint of charred, caramelized flavor that’s hard to get from jarred peppers. Some cooks like to roast a batch of peppers and freeze extras for later. If you want a deeper flavor, try adding a pinch of cayenne or a few drops of hot sauce.
Roasted red pepper hummus is great with crackers, sandwiches, or as a topping for grilled chicken or fish.
A common beginner mistake is adding too much roasted pepper at once. This can make the hummus thin and watery. Start with half a cup, blend, and add more if you want a stronger pepper flavor. Also, smoked paprika is optional but really boosts the “grilled” flavor—don’t skip it if you have some handy.
Spicy Avocado Hummus (creamy & Bold)
Love a little heat? Avocado hummus is creamy, rich, and gets a spicy kick from jalapeño or chili flakes. It’s a new favorite for anyone who loves guacamole and hummus.
🍫 Ingredients:
- 1 can (15 oz) chickpeas (drained, rinsed)
- 1 ripe avocado
- 2 tbsp tahini
- 2 tbsp olive oil
- 2 tbsp lemon juice
- 1 small garlic clove
- 1/2 tsp salt
- 1 small jalapeño (seeded, chopped) or 1/2 tsp red chili flakes
- 2 tbsp cold water
- Fresh cilantro (for garnish, optional)
🥣 Steps:
- Scoop out the avocado and add to a food processor with chickpeas, tahini, olive oil, lemon juice, garlic, salt, and jalapeño or chili flakes.
- Blend until smooth and creamy.
- Add cold water if needed to thin out.
- Taste and adjust seasoning or spice.
- Serve topped with chopped cilantro and a drizzle of olive oil.
Why you’ll love it: Creamy like guacamole, but with the protein and fiber of hummus.
Spicy avocado hummus is perfect for wraps, as a dip for sweet potato fries, or even as a toast topper for breakfast. If you prefer less heat, remove the seeds from the jalapeño or use just a pinch of chili flakes.
If you want it spicier, add more jalapeño or try a dash of hot sauce. The avocado gives this hummus a bright green color and a buttery texture.
A lot of people don’t know that avocado hummus needs to be eaten fresh. Unlike classic hummus, it can brown after a day in the fridge due to the avocado. If you want to keep it green, press a piece of plastic wrap directly onto the surface before sealing the container.
Or, add a little extra lemon juice to slow browning.
Roasted Garlic Hummus (sweet & Savory)
Roasted garlic gives hummus a deep, mellow flavor without the bite of raw garlic. This is a favorite for garlic lovers who want something special.
🍫 Ingredients:
- 1 can (15 oz) chickpeas (drained, rinsed)
- 1 whole garlic bulb
- 3 tbsp tahini
- 2 tbsp olive oil
- 2 tbsp lemon juice
- 1/2 tsp salt
- 1/2 tsp ground cumin
- 2–4 tbsp cold water
- Extra olive oil for roasting
🥣 Steps:
- Preheat oven to 400°F (200°C). Slice the top off the garlic bulb to expose cloves. Drizzle with a bit of olive oil, wrap in foil, and roast for 25 minutes.
- Let the roasted garlic cool. Squeeze out soft cloves.
- In a food processor, combine chickpeas, tahini, olive oil, lemon juice, salt, cumin, and all the roasted garlic.
- Blend until smooth, adding cold water for texture.
- Taste and add more salt or lemon if needed. Serve with a drizzle of olive oil.
Why you’ll love it: Mild, sweet, and full of deep garlic flavor without being overpowering.
Roasted garlic hummus is a great option for anyone worried about garlic breath. Roasting turns garlic sweet and gentle, so you get all the flavor without the sharpness. This hummus is excellent as a spread for sandwiches or to serve alongside roasted vegetables.
For a fancy touch, sprinkle on some toasted sesame seeds or chopped chives.
If you roast extra garlic, store the leftovers in olive oil in the fridge. They’re perfect for adding to mashed potatoes, pasta, or soups.
Herby Green Hummus (fresh & Zesty)
If you love fresh herbs, this green hummus is bright, zesty, and packed with flavor. Great for summer or when you want something lighter.
🍫 Ingredients:
- 1 can (15 oz) chickpeas (drained, rinsed)
- 1 cup mixed fresh herbs (parsley, cilantro, basil, or mint)
- 3 tbsp tahini
- 2 tbsp olive oil
- 2 tbsp lemon juice
- 1 small garlic clove
- 1/2 tsp salt
- 2–3 tbsp cold water
🥣 Steps:
- Wash and roughly chop the herbs.
- Add chickpeas, herbs, tahini, olive oil, lemon juice, garlic, and salt to a food processor.
- Blend until very smooth and green, adding cold water as needed.
- Taste and adjust seasoning.
- Serve with extra herbs or a squeeze of lemon.
Why you’ll love it: Fresh, bright, and perfect for spring or summer.
This hummus is a smart way to use up leftover herbs in your fridge. If you have a bunch of parsley or cilantro wilting, just toss them in. For a twist, try adding a handful of baby spinach—this boosts the green color and adds nutrients without changing the flavor much.
Herby green hummus is delicious with raw vegetables, as a spread for wraps, or as a topping for grain bowls. Try it with grilled chicken, fish, or falafel for a light, flavorful meal.
Comparing The Hummus Recipes
To help you choose the best recipe for your taste and needs, here’s a side-by-side comparison of the five hummus styles:
| Recipe | Main Flavor | Color | Time | Special Ingredient |
|---|---|---|---|---|
| Classic Creamy Hummus | Smooth, nutty | Light beige | 7 min | None |
| Roasted Red Pepper Hummus | Sweet, smoky | Orange-red | 12 min | Roasted red pepper |
| Spicy Avocado Hummus | Creamy, spicy | Pale green | 8 min | Avocado, jalapeño |
| Roasted Garlic Hummus | Sweet, mellow garlic | Light beige | 30 min | Roasted garlic |
| Herby Green Hummus | Fresh, zesty | Green | 9 min | Fresh herbs |
Each recipe offers a unique taste experience. Classic is nutty and smooth; roasted red pepper is sweet and smoky; spicy avocado brings heat and creaminess; roasted garlic is mellow; herby green is fresh and lively. This means there’s a hummus for every season and every mood.
Mistakes To Avoid When Making Hummus
Making hummus is easy, but there are some common pitfalls even experienced cooks face. Avoid these mistakes for the best results:
- Don’t use old or poor-quality tahini—it makes the hummus bitter.
- Avoid skipping the cold water step. It’s the secret to creamy texture.
- Don’t under-blend—if you stop too soon, your hummus will be gritty.
- Don’t add too much liquid at once; go slowly to avoid runny hummus.
- Avoid using canned chickpeas straight from the can without rinsing (it can taste metallic).
- Don’t forget to taste and adjust seasoning after blending.
Many beginners also forget that flavor develops as hummus sits. If possible, make it 30 minutes ahead for the best taste.
Another easy mistake is using too much garlic. Raw garlic is powerful—a little goes a long way, especially if you plan to store the hummus for a day or two. Over-blending when adding herbs or peppers can also dull the color or flavor.
Finally, never skip adding a finishing drizzle of olive oil and a pinch of spice—these small touches make a big difference.
If your hummus comes out too thick, don’t panic. Just add cold water, one tablespoon at a time, and blend again. If it’s too thin, blend in a few more chickpeas. These quick fixes can save a batch that doesn’t seem quite right.
Storage And Reuse Ideas
Homemade hummus keeps well if stored right. Here’s how to get the most from your batch:
- Fridge: Store in an airtight container for up to 5 days.
- Freezer: You can freeze hummus, but texture may change slightly. Use within 2 months. Thaw overnight in the fridge and stir well before serving.
- Reheating: Hummus is usually served cold or at room temperature, but you can gently warm it in the microwave for 20–30 seconds if you prefer.
- Reuse ideas: Spread hummus on sandwiches or wraps, use as a base for salad dressings, or stir into pasta for a creamy sauce.
Some people like to use leftover hummus as a pizza sauce—spread it on flatbread, top with veggies, and bake until warm. You can also stuff hummus into baked potatoes or use as a filling for deviled eggs. Leftover hummus adds protein and flavor to grain bowls, especially when topped with roasted vegetables or grilled meats.
If your hummus has thickened too much in the fridge, simply stir in a bit of water or olive oil to loosen it. If you freeze hummus, thaw slowly in the fridge and stir before serving to bring back the creamy texture.
Quick Tips And Shortcuts
Want to make hummus even faster or adapt the recipe for what you have? Try these ideas:
- Use canned chickpeas for speed, but rinse well.
- No tahini? Substitute with peanut butter or sunflower seed butter—the flavor will change but it works.
- For extra protein, add a spoonful of Greek yogurt to the blend.
- If you don’t have a food processor, use a blender or even a potato masher for a rustic texture.
- Short on olive oil? Use a mix of olive oil and plain yogurt for a lower-fat dip.
- For extra flavor, add a pinch of cayenne, sumac, or smoked paprika.
If you want to impress guests, try swirling two flavors together in one bowl—classic and roasted pepper look especially nice. Another fun trick is to top your hummus with roasted chickpeas or crispy onions for crunch.
If you want to take your hummus to the next level, try using a little bit of ice water instead of just cold water. The ice helps whip the hummus into an even lighter, fluffier dip. And if you’re out of lemon juice, a splash of vinegar can work in a pinch.
Credit: www.inspiredtaste.net
Nutrition: Hummus By The Numbers
Hummus is not only tasty, but it’s also good for you. Here’s a nutrition snapshot for a standard 2-tablespoon (30g) serving of classic hummus:
| Calories | Protein (g) | Fat (g) | Carbs (g) | Fiber (g) | Sodium (mg) |
|---|---|---|---|---|---|
| 70 | 2 | 5 | 4 | 1.5 | 100 |
That’s more protein and fiber than most creamy dips, with no cholesterol and healthy fats from olive oil and tahini.
Many people don’t realize that hummus is also a good source of iron, magnesium, and B vitamins. The chickpeas and tahini combine to give you complete plant protein. For those following a vegan or vegetarian diet, hummus is a filling, nutritious staple.
It’s also naturally gluten-free and dairy-free.
If you’re watching your sodium, try making your own hummus with less salt or using low-sodium canned chickpeas. For even more fiber, blend in a small amount of cooked lentils or white beans.
Frequently Asked Questions
How Do I Make Hummus Without Tahini?
You can use peanut butter or sunflower seed butter as a substitute, though the flavor will be different. Some people skip tahini, but the dip will be less creamy and lack the rich, nutty taste. Try adding a little olive oil and extra lemon juice to help balance the flavor.
Can I Use Dried Chickpeas Instead Of Canned?
Yes, but you’ll need to soak and cook them first. Use about 1/2 cup dried chickpeas to make the same amount as one can. Cooking dried chickpeas gives a richer, fresher flavor, but canned are much faster.
To use dried chickpeas, soak overnight in plenty of water, then simmer until soft (usually 1–1. 5 hours). For extra creaminess, add a pinch of baking soda to the cooking water—this helps the skins soften and makes blending easier.
Is Hummus Healthy For Weight Loss?
Hummus is high in fiber and protein, which can help you feel full. Just watch portion sizes, as tahini and olive oil add calories. Use hummus as a dip for veggies or as a spread instead of higher-calorie options.
Why Is My Hummus Grainy And Not Smooth?
A common cause is not blending long enough or skipping the cold water step. Also, if you use low-quality tahini or don’t peel the chickpeas, the texture can be rough. Try blending longer and add a bit more water or olive oil.
Another tip: If you want super-smooth hummus, blend the tahini and lemon juice together first until fluffy, then add the chickpeas. This little trick, often used by chefs, helps create a lighter texture.
Can I Make Hummus Ahead For A Party?
Absolutely! Hummus tastes even better after a few hours in the fridge. Just store in a covered container and drizzle with extra olive oil before serving. You can make it up to 2 days in advance.
For parties, try serving several flavors side by side for variety. Add a plate of fresh veggies, pita, or chips, and your snack table is set.
—
Making your own hummus is quick, affordable, and always rewarding. Try classic, roasted red pepper, spicy avocado, roasted garlic, or herby green hummus—each offers a unique twist. Pin your favorite recipe for later, and share which flavor you’ll try first. What’s your favorite way to eat hummus? Let us know! For more ideas and healthy dips, check out this Bon Appétit hummus guide.

Credit: downshiftology.com