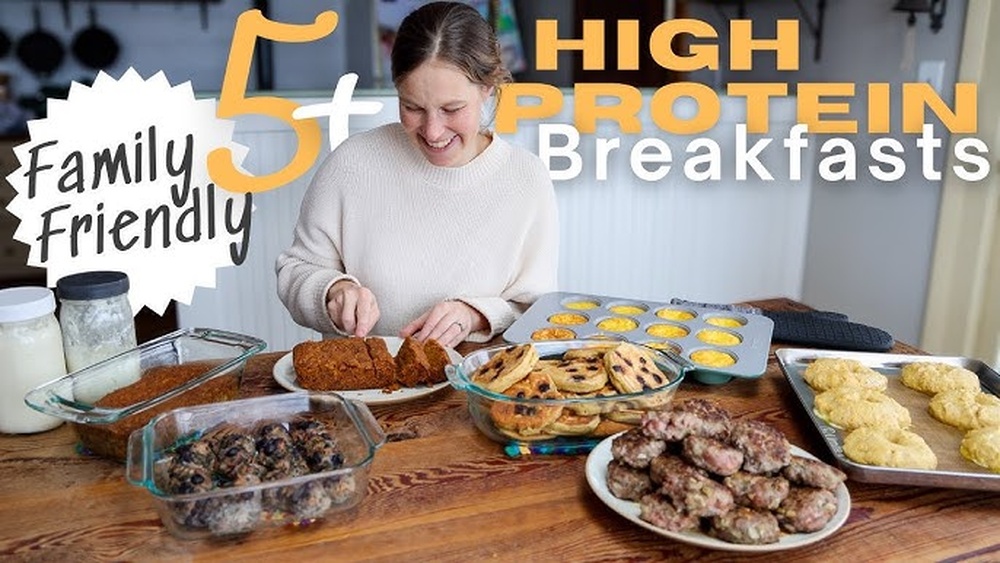
Waking up to a busy morning often means skipping breakfast or grabbing something unhealthy in a rush. Many of us feel the stress of not having enough time, especially when hunger hits just as we need to get out the door. The good news? With a little planning, you can enjoy a stress-free morning and still eat a tasty, healthy meal. This article will show you seven easy make-ahead breakfast recipes. Each recipe is simple, uses basic ingredients, and helps you start your day right—no matter how busy you are.
A lot of people think healthy breakfasts must be complicated or require special tools. Actually, with the right recipes and a bit of planning, you can eat well every day—even if you’re not a morning person. These make-ahead breakfasts are perfect for families, students, or anyone wanting more energy in the morning.
You’ll learn not just the recipes, but also how to store, reheat, and adapt each one for your needs.
Why Make-ahead Breakfasts Are A Game Changer
Make-ahead breakfasts can change your mornings for the better. They save you time, money, and energy, and you don’t need fancy cooking skills. Here’s why these recipes are so helpful:
- Fast to prepare and grab on busy days
- Simple steps, perfect for all skill levels
- Budget-friendly ingredients you likely have at home
- Fewer dishes and less mess in the morning
- Meals you can customize for your taste
- Great for meal prep and planning ahead
There’s a hidden benefit as well: eating a real breakfast helps prevent mid-morning cravings, so you’re less likely to snack on unhealthy foods. Also, make-ahead meals help reduce food waste. Since you plan portions in advance, you use only what you need and store leftovers for later.
Many people notice that planning breakfast improves their whole day. You feel more organized, you start with better energy, and you’re not rushing to find something to eat. It’s a small change that has a big impact—especially if you have children or a busy work schedule.
Overnight Oats: The Classic Grab-and-go Breakfast
Overnight oats are the ultimate make-ahead breakfast. You mix everything the night before, and by morning, you have a cool, creamy meal ready to eat. It’s filling, easy to change up, and perfect for people who want breakfast in under a minute.
🍫 Ingredients:
- 1/2 cup old-fashioned oats
- 1/2 cup milk (any type)
- 1/4 cup yogurt (optional for creaminess)
- 1 tablespoon chia seeds (optional)
- 1 tablespoon honey or maple syrup
- 1/2 cup fruit (berries, banana, apple, etc.)
🥣 Steps:
- In a jar or bowl, combine oats, milk, yogurt, and chia seeds.
- Stir in honey or syrup and mix well.
- Add your favorite fruit on top.
- Cover and refrigerate overnight.
- In the morning, stir and enjoy cold, or microwave for 30 seconds for a warm version.
Why you’ll love it: Customizable and ready when you wake up.
Extra detail: Overnight oats are popular because they’re so versatile. You can use almond milk for a dairy-free option, or coconut yogurt if you want a tropical flavor. Try different combinations—like apple and cinnamon, peanut butter and banana, or mango and coconut. If you have kids, let them choose their own fruit or toppings. This helps them get excited about breakfast and makes mornings smoother.
Many beginners forget to stir the chia seeds again after five minutes. This second stir is important—otherwise, the seeds can clump at the bottom. Also, oats soften best with old-fashioned or rolled oats. Quick oats get mushy, and steel-cut oats need much longer soaking.
Egg Muffin Cups: Protein-packed Morning Fuel
Egg muffin cups are like mini omelets baked in a muffin tin. They’re great for busy mornings and can be eaten hot or cold. You can add veggies, cheese, or even cooked meat for variety.
🍫 Ingredients:
- 6 large eggs
- 1/3 cup milk
- 1/2 cup cheese (cheddar or mozzarella)
- 1 cup chopped veggies (spinach, bell peppers, onion)
- 1/4 cup cooked meat (bacon, sausage, or ham, optional)
- Salt and pepper to taste
🥣 Steps:
- Preheat oven to 180°C (350°F). Grease a muffin tin or use paper liners.
- In a bowl, whisk eggs and milk.
- Add cheese, veggies, meat, salt, and pepper. Mix.
- Pour evenly into muffin cups, filling 3/4 full.
- Bake for 18-20 minutes until set.
- Let cool and store in the fridge.
Why you’ll love it: High in protein and keeps you full longer.
Extra explanation: Egg muffin cups are perfect for using up leftovers. If you have a small amount of cooked vegetables or cheese, just chop them up and add them to the mix. If you want a dairy-free version, skip the cheese and add more veggies or cooked potatoes. For a spicy twist, add a pinch of chili flakes or diced jalapeños.
One non-obvious tip: don’t overfill the muffin cups. Eggs expand as they cook, so leave a little space at the top. If you want each cup to look more attractive, put a slice of tomato or a sprinkle of herbs on top before baking.
Egg muffin cups are also freezer-friendly. Wrap them in plastic or foil, and you can reheat them in the microwave for a fast breakfast or snack.
Freezer-friendly Breakfast Burritos: Hearty And Handy
Breakfast burritos are perfect for meal prep. They’re filling, portable, and freeze well. You can make a big batch and just heat one up when you need a quick breakfast.
🍫 Ingredients:
- 4 large tortillas
- 4 eggs
- 1/2 cup cooked beans (black or pinto)
- 1/2 cup shredded cheese
- 1/2 cup salsa
- 1 cup cooked potatoes or hash browns
- 1/2 cup cooked meat (optional)
- Salt and pepper
🥣 Steps:
- In a pan, scramble eggs with salt and pepper.
- Warm tortillas in the microwave for 10 seconds.
- Place eggs, beans, potatoes, cheese, salsa, and meat (if using) in the center of each tortilla.
- Fold in sides and roll up tightly.
- Wrap each burrito in foil or parchment paper.
- Store in the freezer.
To eat: Microwave for 1-2 minutes (remove foil first) or bake at 180°C (350°F) for 20 minutes.
Why you’ll love it: Perfect for eating on the go—no fork needed.
Extra example: If you want a vegetarian option, skip the meat and add more beans or sautéed mushrooms. For a breakfast with less carbs, use smaller tortillas or wrap the filling in a lettuce leaf after reheating. You can also split large burritos in half before freezing for smaller servings.
Some people forget to cool the burritos before freezing. This step is important—wrapping hot burritos can create steam and make them soggy when you reheat. Also, labeling each burrito with the filling (for example, “veggie” or “ham & cheese”) helps you grab the one you want.
Chia Pudding: Creamy, Nutritious, And Easy
Chia pudding is a make-ahead breakfast that feels like dessert but is healthy. Chia seeds soak overnight and turn into a thick, creamy pudding. You can add fruit or nuts for crunch.
🍫 Ingredients:
- 3 tablespoons chia seeds
- 1 cup milk (dairy or non-dairy)
- 1 tablespoon honey or maple syrup
- 1/2 teaspoon vanilla extract
- Fruit and nuts for topping
🥣 Steps:
- In a jar or bowl, mix chia seeds, milk, honey, and vanilla.
- Stir well, wait 5 minutes, and stir again (to prevent clumping).
- Cover and refrigerate overnight.
- In the morning, top with fruit and nuts.
Why you’ll love it: Feels like a treat but is full of fiber and omega-3s.
Expanded explanation: Chia seeds are a superfood because they absorb liquid and expand, keeping you full for hours. Their mild taste means they take on any flavor you add. Try a chocolate version by mixing in one tablespoon of cocoa powder, or make a tropical pudding with pineapple and coconut flakes.
Many first-timers make chia pudding too thin or too thick. The right ratio is about 3 tablespoons of chia seeds for each cup of milk. If the pudding is too thick in the morning, just stir in a splash of extra milk.
A non-obvious insight: You can blend chia pudding for a smoother texture if you don’t like the seeds. Just blend before chilling and it will be like a mousse.
Peanut Butter Banana Baked Oatmeal Bars: Breakfast You Can Hold
These bars are chewy, filling, and easy to pack. Make a batch on the weekend, cut into squares, and grab one each morning. They’re great for kids and adults alike.
🍫 Ingredients:
- 2 ripe bananas
- 2 cups rolled oats
- 1/2 cup milk
- 1/2 cup peanut butter
- 1/4 cup honey or maple syrup
- 1 teaspoon cinnamon
- 1 teaspoon baking powder
- Pinch of salt
🥣 Steps:
- Preheat oven to 180°C (350°F). Grease an 8×8 inch (20×20 cm) baking dish.
- In a bowl, mash bananas. Stir in peanut butter and honey.
- Add oats, milk, cinnamon, baking powder, and salt. Mix well.
- Spread mixture in the dish and smooth the top.
- Bake for 25-30 minutes until set and golden.
- Cool, then cut into bars.
Why you’ll love it: Easy to eat with your hands—no mess.
More detail: These bars are naturally sweet from the bananas and honey, so there’s no need for extra sugar. For a nut-free version, use sunflower seed butter instead of peanut butter. You can also add dried fruit, like raisins or cranberries, for different flavors and textures.
Some people skip the baking powder, but it helps the bars stay light and not too dense. Letting the bars cool before cutting is important—they hold their shape better and are less crumbly.
A practical tip: Wrap bars in parchment paper for easy grabbing. They’re perfect for after-school snacks too, not just breakfast.

Credit: www.imthecheftoo.com
Greek Yogurt Parfaits: Layered, Sweet, And Simple
Greek yogurt parfaits look and taste impressive, but take just minutes to make. You can prepare jars in advance and grab one in the morning. They’re great for a quick protein boost.
🍫 Ingredients:
- 1 cup Greek yogurt
- 1/2 cup granola
- 1/2 cup fruit (berries, mango, apple)
- 1 tablespoon honey
🥣 Steps:
- In a jar or glass, layer Greek yogurt, fruit, and granola.
- Drizzle honey on top.
- Repeat layers as needed.
- Cover and refrigerate overnight (or up to 3 days).
Why you’ll love it: Tastes like dessert but full of protein and calcium.
Expanded explanation: Greek yogurt is thicker and higher in protein than regular yogurt, which helps you feel full longer. For a dairy-free version, use coconut or soy yogurt. Layer in different fruits for color—kiwi, pineapple, or even pomegranate seeds are great choices.
A common mistake is adding granola too early. If you want crunch, keep it in a small container and add right before eating. For extra nutrition, stir in a tablespoon of flaxseed or hemp hearts.
A non-obvious idea: If you meal prep for the whole family, set up a “parfait bar” with bowls of yogurt, fruit, and toppings so everyone can make their own combinations.
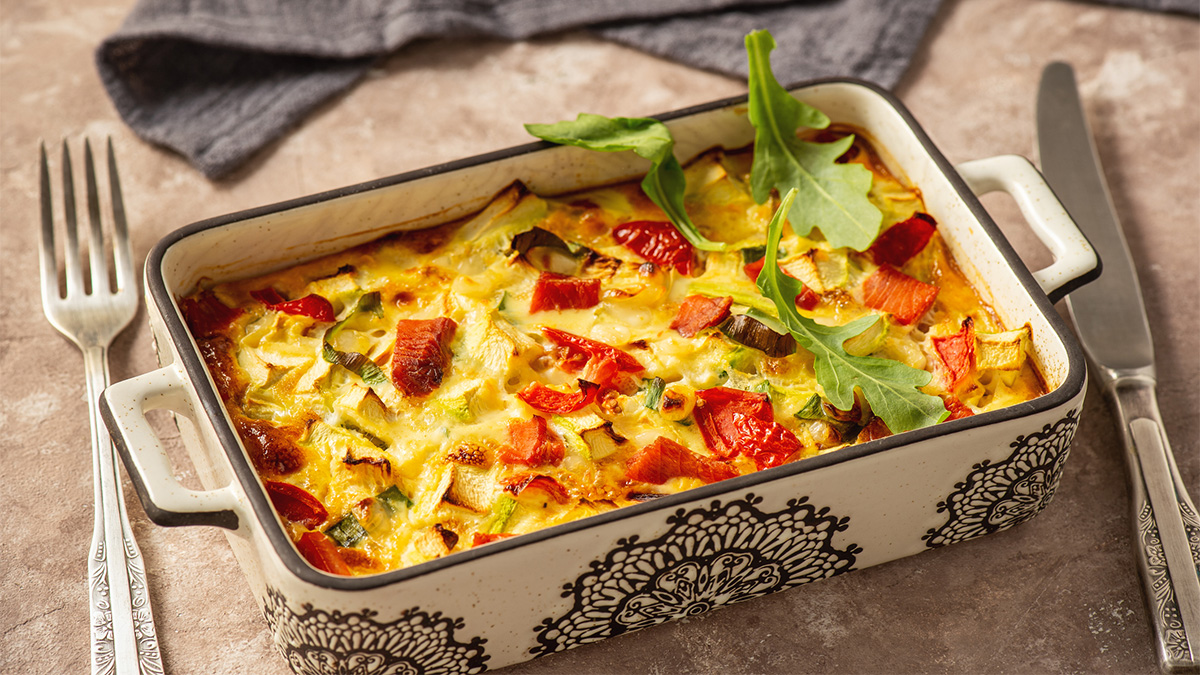
Savory Veggie Breakfast Casserole: Family-style Meal Prep
This casserole is perfect if you want a hot breakfast for several days. Make it once, slice, and heat a piece each morning. It’s packed with veggies and eggs for lasting energy.
🍫 Ingredients:
- 8 large eggs
- 1 cup milk
- 2 cups chopped vegetables (broccoli, spinach, bell pepper, onion)
- 1 cup shredded cheese
- 1/2 cup cooked meat (optional)
- 1 teaspoon salt
- 1/2 teaspoon pepper
🥣 Steps:
- Preheat oven to 180°C (350°F). Grease a 9×13 inch (23×33 cm) baking dish.
- In a bowl, whisk eggs, milk, salt, and pepper.
- Spread veggies and meat (if using) in the dish.
- Pour egg mixture over veggies.
- Sprinkle cheese on top.
- Bake for 30-35 minutes until set and golden.
- Cool, cut into squares, and store in the fridge.
Why you’ll love it: One bake gives you breakfast for the whole week.
Added explanation: Breakfast casseroles are flexible. You can use almost any vegetable, so it’s a great way to use up what’s in your fridge. Sweet potatoes, mushrooms, or even leftover roasted vegetables work well. If you’re avoiding dairy, leave out the cheese and add extra herbs for flavor.
One beginner mistake is not draining vegetables that release a lot of water (like spinach or zucchini). Sauté or pat them dry before adding to the dish to keep the casserole from getting watery. Another tip: let the casserole cool before slicing—it will hold together better and store neatly.
If you like a stronger flavor, add a teaspoon of mustard or hot sauce to the egg mixture.

Credit: www.imthecheftoo.com
Common Mistakes With Make-ahead Breakfasts
Make-ahead breakfasts are easy, but there are a few things you should avoid to get the best results:
- Don’t forget to let food cool before covering and refrigerating; this prevents sogginess.
- Avoid overfilling jars or containers—leave room for toppings or mixing.
- Don’t use ingredients that spoil quickly (like cut banana on top) unless eating soon.
- Avoid adding crunchy toppings too early; keep them separate until serving.
- Don’t skip labeling with the date, especially for freezer meals.
- Avoid reheating eggs too long, as they can become rubbery.
Another tip: If you notice condensation inside containers, wipe it out before sealing. Moisture can make food spoil faster or change the texture.
Storing And Reheating Your Make-ahead Breakfasts
Proper storage helps your breakfasts stay fresh and safe to eat. Here’s how to store, reheat, and reuse each type:
| Recipe | Fridge Time | Freezer Time | Reheating | Reuse Ideas |
|---|---|---|---|---|
| Overnight Oats | 3-4 days | Not recommended | Eat cold or microwave 30s | Add nuts, extra fruit |
| Egg Muffin Cups | 4 days | 2 months | Microwave 30s-1min | Crumbled in salad |
| Burritos | 3 days | 2 months | Microwave 1-2min | Slice over rice |
| Chia Pudding | 5 days | Not recommended | Eat cold | Blend into smoothie |
| Baked Oatmeal Bars | 1 week | 3 months | Microwave 20s | Top with yogurt |
| Parfaits | 3 days | Not recommended | Eat cold | Stir into oatmeal |
| Casserole | 5 days | 2 months | Microwave 1min | Wrap in tortilla |
Added practical tip: For the best texture, thaw frozen items in the fridge overnight before reheating. If you’re in a hurry, use your microwave’s “defrost” setting. Always check that food is heated all the way through, especially for eggs and casseroles.
Quick Tips For Even Easier Breakfast Prep
Make-ahead breakfasts are simple, but these tips make them even faster and more flexible:
- Use frozen fruit to save time—no washing or chopping.
- Swap dairy milk for plant milk if you prefer non-dairy.
- Use pre-chopped veggies or leftovers to reduce prep time.
- Portion meals into single-serve containers for grab-and-go.
- Replace honey with agave syrup for a vegan option.
- Freeze leftover casseroles or bars in individual pieces.
More ideas: Set a regular “prep day”—like Sunday night—so you’re always ready for the week. If you share a kitchen, label your food to avoid confusion. Double recipes to save time later, especially for freezer-friendly options.
A non-obvious tip: Keep a master shopping list for these breakfasts. You’ll save time and avoid missing ingredients. If you’re new to meal prep, start with just one recipe per week and add more as you get comfortable.
Comparing Cost And Time: Make-ahead Vs. Store-bought
Making breakfast at home is not only healthier, but it often saves money and time compared to buying meals or snacks on the go. Here’s a quick comparison:
| Breakfast Type | Average Cost per Serving | Prep Time (Batch) | Daily Grab Time |
|---|---|---|---|
| Make-Ahead Oats | $0.75 | 5 mins (4 servings) | 1 min |
| Store-Bought Sandwich | $3.00 | 0 mins | 10 mins (wait in line) |
| Egg Muffin Cups | $1.00 | 25 mins (12 cups) | 1 min |
| Packaged Granola Bar | $1.50 | 0 mins | 1 min |
Added detail: When you buy breakfast on the go, small costs add up over a week or month. For example, a $3 sandwich five days a week is $60/month. But with make-ahead meals, you can feed a family for much less. Also, homemade breakfasts can be adapted for allergies or special diets, saving the hassle of searching for suitable foods in stores.
Credit: www.womansworld.com
Frequently Asked Questions
What Is The Healthiest Make-ahead Breakfast?
The healthiest option depends on your needs, but overnight oats and chia pudding are great choices. They are high in fiber, low in added sugar, and easy to add fruit or seeds for extra nutrition.
How Long Do Make-ahead Breakfasts Last In The Fridge?
Most make-ahead breakfasts last 3 to 5 days in the fridge. Items like baked oatmeal bars and casseroles can last up to a week. Always check for freshness before eating.
Can I Freeze Any Of These Recipes?
Yes, many recipes like breakfast burritos, egg muffin cups, baked oatmeal bars, and casseroles freeze well for up to 2-3 months. Let them cool before freezing and reheat as needed.
Are Make-ahead Breakfasts Good For Weight Loss?
They can be. By preparing your own breakfast, you can control portion size and ingredients. Focus on recipes with protein and fiber to stay full longer and avoid added sugars.
Where Can I Learn More About Meal Prepping?
For more in-depth tips and research, check resources like EatRight.org for professional advice on meal prepping and healthy eating.
A little planning can give you a stress-free morning and a healthy start to your day. Try these seven make-ahead breakfast recipes and see how much easier your mornings become. If you found these ideas helpful, pin your favorite recipe on Pinterest and share with friends! What breakfast will you prep first?